
Contents
• Introduction
• Installing the Ecosoft Smart Grid Controller
• Network Configuration
Introduction
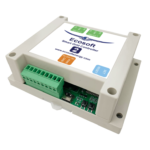
The Ecosoft Smart Grid Controller 1 (SGC 1) is a device that is able to operate a heat pump to keep the heating costs as low as possible, by benefitting from energy price fluctuations during the day. Because cheap energy is more than often green energy (solar and wind energy), there are benefits for the environment as well.
Every day, the SGC creates a planning with “moments to switch” and takes the following into account:
• Your location (where outside temperature and prices depend on)
• The efficiency of your heat pump at certain outside temperatures
• The electricity prices during 24 hours of a day
• The efficiency of your gas boiler (if present)
• The current gas price
• Your preferences filled out in the energy planner.
The SGC is suitable for hybrid heat pumps as well. For example, if at some time during the day, gas heating by the gas boiler is cheaper than the electrical power heating by the heat pump, the SGC can switch the heat pump in a lower operating mode.
The SGC should only be installed by an expert installer.
Installing the Ecosoft Smart Grid Controller 2 (SGC2)
The Smart Grid Controller 2 is designed to operate a heat pump or heat pump boiler via the Smart Grid (SG) interface or via an EVU blocking contact.
The SGC should be installed by an experienced installer with knowledge on electrical installations and heat pumps.
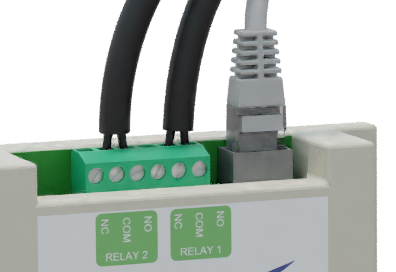
Connect relay 1 and 2 with the SG-ready interface of your heat pump, if present. When your heat pump only supports EVU, then connect relay 1 (to the EVU connector of the heat pump), and don’t configure the modes High and Max in the SGC Energy Planner.
The device can be connected to the network with a network cable or via wireless WiFi. We recommend to use a wired connection.
Note: Hold the SET button of the SGC for 40 seconds to reset the WiFi-setting and the password of the SGC, when necessary.
Network Configuration
• Connect the device with an ethernet cable to your network.
• On a computer in your network, open a browser and visit http://sgc.local
• If you are asked to login, use these credentials:
Username = eco
Password = power
As an alternative you can access the device via WiFi:
• On your phone, go to the WiFi settings and connect to the network called “SGC”.
• In the browser on your phone, go to http://192.168.4.1. This is a temporary address; after configuration the SGC will no longer be reachable at this address.
• When prompted to log on, use these credentials: Username = eco Password = power
• The controller shows a list of detected WiFi networks. Select your own WiFi network and fill in the WiFi password that belongs to it.
• Optionally, choose a hostname for the SGC in the network. The default name is “SGC”. This name you can use later to access the SGC via the browser. If the name remains “SGC”, the SGC will be accessible via http://sgc.local.
• Press Save. It might take a minute before the SGC establishes a connection to your WiFi network. When a connection is successfully made, the browser shows the new IP address that your network has assigned to the SGC. Within a few seconds, the browser will open this address.
• Your phone should be reconnected to your own WiFi network; generally this will happen automatically. If the SGC prompts you to log on again, fill in eco and power, as before.
• If the SGC page doesn’t open or the page doesn’t prompt you to log on, you can try to reload the page. As an alternative you can access the SGC via http://sgc.local or by entering the new IP address directly.
In the Energy Planner you can configure when the heat pump will be put in one of the 4 available modes. Press on the question mark in the Energy Planner to open a document in your browser that explains the possibilities.